Photographing Steam, Sizzle, and Melt: Capturing Hot Food
The fajitas come out of the kitchen roaring. Onions crackling, steam pouring off the cast iron, the whole dining room turning to look. You raise your phone, tap the screen, and the photo you get back looks like brown meat on a dark pan. No steam. No sizzle. None of the theater that made three tables ask what that was.
That gap between what you saw and what the camera recorded is the single most frustrating problem in restaurant photography, and it is not a camera problem. Steam, sizzle, and melt are the strongest appetite signals food can send -- they tell the brain this was cooked seconds ago, for you -- and they are also the most fragile. Get the setup wrong and they vanish before the shutter opens. Get it right and you have an image that stops a scroll cold.
What makes this expensive is that hot dishes are usually your signature items. The sizzling platter, the bubbling gratin, the pull-apart cheese, the ramen with steam curling off the broth: these are the dishes with the highest price points and the strongest word of mouth. When their photos look lukewarm, the menu quietly undersells the best thing you do. Meanwhile the cold items -- salads, desserts, drinks -- photograph easily and end up looking better than the food that actually made your reputation.
Here is the fix, and it comes down to three things: light position, timing, and preparation.
Why Steam Is Invisible Until You Light It Correctly
Steam is not a solid object. It is a cloud of tiny water droplets, and you only see it when light scatters off those droplets toward your lens. That physics dictates everything.
When your light source sits in front of the dish -- ceiling lights, a window behind you, a phone flash -- the light hits the steam and scatters mostly away from you. The vapor becomes effectively transparent. You saw it with your eyes because your eyes were adapting and comparing over time; the camera gets one frozen frame and records almost nothing.
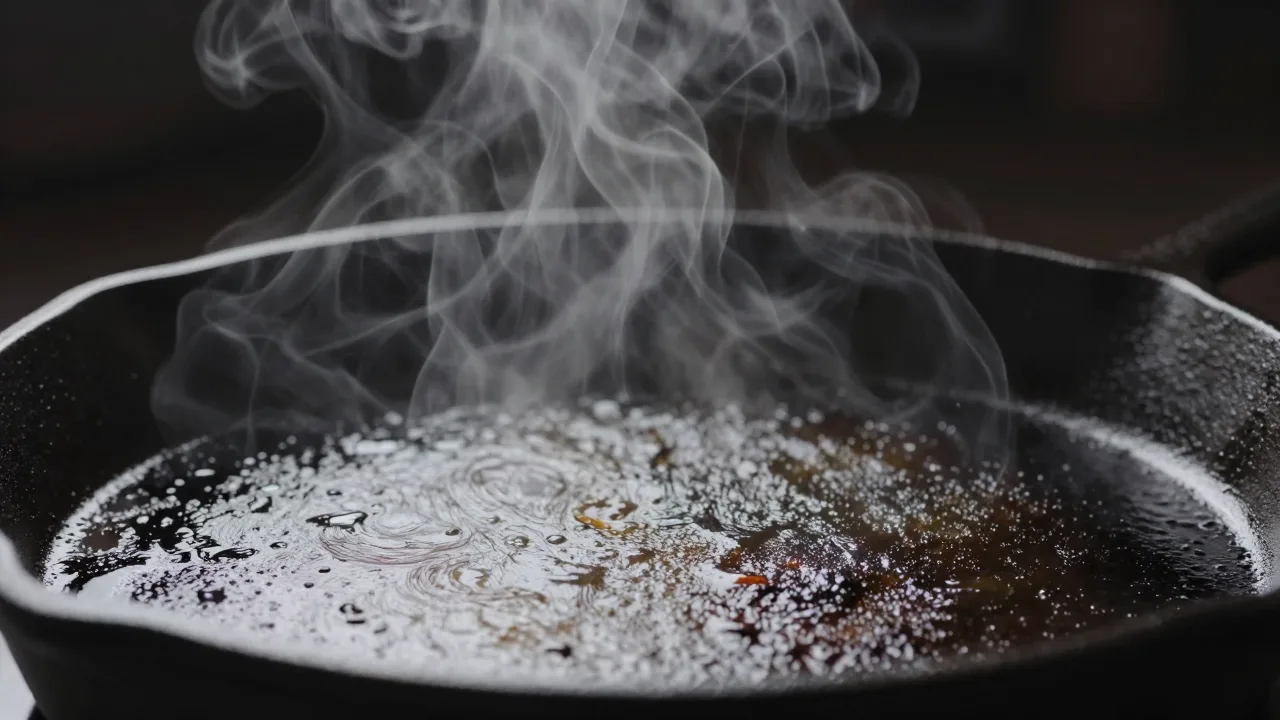
Move the light behind the dish and the physics flips. Now the droplets scatter light forward, toward your lens, and each wisp lights up like smoke in a headlight beam. Put something dark behind that steam -- a black board, a dim corner of the room, a dark wall -- and the contrast makes it unmistakable.
So the formula for visible steam is simple and non-negotiable:
- Light behind or 45 degrees behind the dish. A window with the plate between you and the glass is perfect. At night, a single LED panel works.
- Dark background directly behind where the steam rises. Black foam board costs about $4 and is the highest-return prop in food photography.
- Low camera angle. Steam rises vertically. Shoot from above and it exits the frame immediately; shoot from near plate level and it stays in the picture for the entire column of its travel.
- Expose for the food, not the bright background. On a phone, tap the food to set exposure, then drag down slightly if the highlights blow out.
Get those four right and steam appears in almost every frame. This is the same lighting principle that governs everything else in a restaurant kitchen -- position beats power, every time -- and it is worth reading alongside our broader guide to lighting dishes in a real restaurant environment.
The 90-Second Window
Hot food does not wait. Understanding the decay curve tells you exactly how to sequence a shoot.
- 0-30 seconds: peak steam. This is the only window where a broth, a stew, or a hot skillet throws visible vapor without help.
- 30-60 seconds: peak melt. Cheese is at its most stretchy and glossy; a pull shot works here and nowhere else.
- 60-120 seconds: gloss starts to dull. Sauces begin to skin over, butter sets, fried coatings soften as trapped steam escapes into the crust.
- Past 2 minutes: the dish is now a still life of something that used to be hot. Greens wilt from residual heat, rice dries at the edges, and no editing will put the life back.
The practical consequence is that every second you spend adjusting the set is a second stolen from the food. Professional shoots handle this by building the entire scene around a stand-in plate -- an identical dish plated cold, or even an empty plate of the right size -- locking focus, exposure, and framing, and only then firing the real dish. When it arrives, you swap the stand-in out, fine-tune the garnish, and shoot. Total handling time: under fifteen seconds.
Two more habits that buy you time:
- Warm the plate. A cold plate pulls heat out of the food instantly and kills steam. Most kitchens already have a plate warmer; use it for the shoot too.
- Shoot in burst mode. Steam moves. A single frame might catch a thin wisp; a two-second burst catches the one frame where the vapor forms a beautiful shape. You are fishing, and burst mode gives you a wider net.
Rescue the Frames Where Timing Beat You
KwickPhoto's AI restores contrast and color on dishes shot in bad kitchen light, so a slightly late frame still looks like it came off the pass.
Try KwickPhoto FreeSizzle: Photographing Heat You Can Hear
A sizzling platter is the loudest dish in the room, and sound does not travel through a photograph. What you have to do instead is translate the sound into visual cues the viewer's brain converts back into heat.
Show the fat in motion
The visual signature of sizzle is bubbling oil and butter. Shoot low so you catch the meniscus of fat at the edge of the skillet, where bubbles are largest and most visible. Backlight makes those bubbles glow. A tiny splash of oil frozen mid-air, caught in a burst, is worth more than any amount of styling.
Use the pan as context
The cast iron itself is a heat cue. Its dark, matte surface reads as heavy and hot, and the contrast between charred pan and glistening food is the entire drama of the shot. Keep the rim in frame. A cropped-in shot of just the meat loses the reason the photo is exciting.
Add liquid at the moment of the shot
Most sizzling platters get their theater from a deglaze -- stock, juice, or sauce hitting hot metal. Do this on camera. Have someone pour while you shoot in burst mode. The eruption of steam lasts about three seconds and produces the single best frame of the session almost every time.
Keep the background dark
This is the same rule as steam, and it matters twice as much here because you are trying to show both vapor and highlight. A busy, bright kitchen background steals contrast from both.
Melt: The Cheese Pull and Its Cousins
The melt shot -- cheese stretching from a slice, raclette pouring over potatoes, chocolate breaking open in a lava cake -- is the most reliably viral image in food. It also has the tightest timing of anything on this list.
Cheese stretches beautifully in a narrow temperature band. Too hot and it runs like liquid without forming strands; too cool and it snaps. For most mozzarella-based dishes that band opens roughly 45 to 90 seconds after leaving the oven. You cannot chase it -- you have to be aimed and ready before it arrives.
A workable melt-shot procedure:
- Set the camera on a tripod or a stack of books, framed on the spot where the pull will happen, focus locked, exposure locked.
- Position the light behind and slightly to one side. Backlight makes cheese strands luminous; front light makes them look like string.
- Have a second person do the lifting. Trying to pull and shoot simultaneously produces blurry frames and short pulls.
- Lift slowly and steadily -- a fast pull snaps the strands. Aim for a lift over about three seconds.
- Burst the entire lift. You are looking for the frame where the strands are longest but still intact.
The same principles apply to a chocolate lava cake spilling its center, a runny egg yolk breaking over hash, and butter melting into a hot roll. Backlight the flow, shoot low, and burst through the entire action. Styling the plate so the flow has somewhere beautiful to go is half the work, and it draws on the same fundamentals covered in our guide to food styling basics for restaurants.
Example scenario: a 90-seat grill house whose sizzling skillet photographed as a dark pan
Illustrative scenario — a composite example built to show how the numbers work. It does not describe a real business or customer.
Consider a 90-seat grill house in Katy, Texas whose sizzling garlic-butter shrimp skillet is the dish servers get asked about most -- and whose photo on the online ordering page is, frankly, a picture of a dark pan.
Shot in the dining room at 3pm with the overhead lights on. Steam is visible in real life. In the photo there is nothing. Just shrimp on black iron, looking like it has been sitting there an hour.
Suppose the reshoot in April 2026 takes under half an hour and changes three things. The owner moves a prep table next to the kitchen's side window, props a piece of black foam board opposite the light so it sits behind the skillet, and drops the camera to about six inches above the tabletop. Then a line cook fires the skillet and carries it over while the shot is already framed and focused.
The pour is the trick. Butter and lemon go over the skillet right in front of the lens, and a whole cloud of steam goes up. Backlit against the black board it looks like a special effect. Four tries and it is there.
The set is processed through KwickPhoto to warm the shadows and lift the shrimp's color, then the image is replaced across the site, ordering page, and two delivery platforms. Over the next eight weeks in this example, the shrimp skillet's order volume rises 27%, and it becomes the item most frequently added to tables that have already ordered.
The dish never changed. The restaurant finally took a photo that looks like what the guests see when it lands on the table.
Gloss Without Grease: Getting Texture Right
Hot food is shiny, and shiny is a knife's edge. The same sheen that reads as "just glazed, still hot" can read as "swimming in oil" if the light is wrong.
The variable is the size of your light source relative to the food. A small, hard source -- a bare bulb, a phone flash, direct midday sun -- produces tight, blown-out specular highlights: hard white dots that look like grease slicks. A large, soft source -- a window with a sheer curtain, a light bounced off a white wall, a diffuser panel -- spreads the same highlight into a gentle gradient that reads as appetizing gloss.
Practical translation: never use direct on-camera flash for hot food. If you must add light, bounce it off a ceiling or wall, or push it through a white sheet. In a dim dining room at night, one LED panel behind a shower curtain will beat a $2,000 camera used badly.
Background choice does a lot of quiet work here too. Dark, matte surfaces absorb stray reflections and make gloss stand out; bright glossy surfaces compete with the food and bounce hot spots back into the frame. Our breakdown of which surfaces make food pop goes deeper on the trade-offs, but for hot food the short version is: go darker than feels natural.
Building a Hot-Food Shoot That Does Not Fight the Kitchen
The logistics matter as much as the technique, because a shoot that disrupts service will not happen twice.
- Shoot between services. Around 2:30pm to 4pm in most restaurants. The kitchen is calm, the light is still good, and nobody is waiting on the pass.
- Batch by cooking method. Shoot everything that comes off the grill together, then everything from the fryer, then everything from the oven. The station stays hot and the cook stays in rhythm.
- One dedicated shooter, one dedicated helper. The helper carries, garnishes, pours, and pulls. The shooter never leaves the camera.
- Keep the set in one place. Build it once, near the kitchen, and bring every dish to it. Moving the set between dishes burns your whole time budget.
- Feed the crew the dishes afterward. A shoot that ends with the team eating the props is a shoot people will happily do again next quarter.
If you are planning a full menu session rather than fixing one or two items, it pays to work from a structured plan for the whole day -- angles, order, props, and platform crops decided in advance. A complete walkthrough of that process lives in our main-site restaurant photography guide, and the AI-assisted side of getting a consistent look across dozens of hot dishes is covered in this breakdown of how AI editing standardizes menu photos.
Mistakes That Kill Hot-Food Photos
- Front lighting. Steam disappears, gloss goes flat. This is the number one error and the easiest to fix.
- Shooting from overhead. Vertical steam leaves the frame instantly. Drop the camera.
- Light background behind steam. No contrast, no visible vapor.
- Building the set after the food arrives. By the time you are framed, the window has closed.
- Single frames instead of bursts. Steam and pulls are moving targets; one shot is a lottery ticket.
- Cold plates. They drain heat and steam in seconds.
- Over-editing to compensate. Cranking saturation on a dead-looking dish makes it look artificial rather than hot. Fix the capture, then edit lightly.
The Bottom Line
Hot food is the hardest thing on your menu to photograph and the most rewarding when you get it right, because heat is the one quality a photograph can convey that a written description never quite lands. The technique is not complicated: put the light behind the dish, put something dark behind the steam, get the camera down near plate level, diffuse everything, and be completely ready before the food leaves the kitchen.
Give yourself a 90-second window and treat it like a service ticket. Build the set on a stand-in, lock focus, burst through the action, and shoot the pour or the pull live. Do that on your five hottest signature dishes and you will have the strongest images on your entire menu -- the ones that make somebody scrolling at 6pm decide, right then, that this is dinner.
Consistent Hot-Food Photos Across the Whole Menu
KwickPhoto is part of KwickOS, the all-in-one platform for restaurants. Batch-correct color and contrast across your entire shoot, then publish straight to your menus, ordering pages, and delivery listings.
Get Started at KwickOS.comFrequently Asked Questions
How do you make steam show up in a food photo?
Steam only becomes visible when it is lit from behind against a dark background. Put your light source behind or slightly behind-and-to-the-side of the dish, place something dark where the steam will rise, and expose for the food rather than the background. Front lighting makes steam effectively invisible.
How long do I have to photograph a hot dish?
Roughly 60 to 90 seconds from the pass. Steam is strongest in the first 30 seconds, melted cheese begins to set at about 60 seconds, fried coatings soften as trapped moisture escapes, and sauces skin over within two minutes. Build the entire set before the dish is fired so the only thing left to do is shoot.
What is the best angle for sizzling skillet dishes?
Shoot low, between 10 and 30 degrees above the rim. A low angle puts the rising steam against the background where backlight can catch it, keeps the skillet's edge in frame for context, and shows the glossy surface of the food. Overhead angles flatten the steam out of the picture entirely.
Should I use fake steam or props to fake heat?
For your own menu, you rarely need to. A dish photographed within a minute of leaving the pass produces plenty of real steam if you light it correctly. Hiding a hot damp cloth or a cup of just-boiled water behind the plate is a common trick when natural steam is faint, and it is honest as long as the dish itself is the real menu item.
Why does my hot food look greasy instead of glossy?
Greasy is what gloss looks like when the light is small and hard. A bare bulb or direct flash creates tight, blown-out specular highlights that read as oil slick. Diffuse the same light through a white sheet or shoot near a window with a curtain, and those highlights spread into the soft sheen that reads as fresh and hot.